
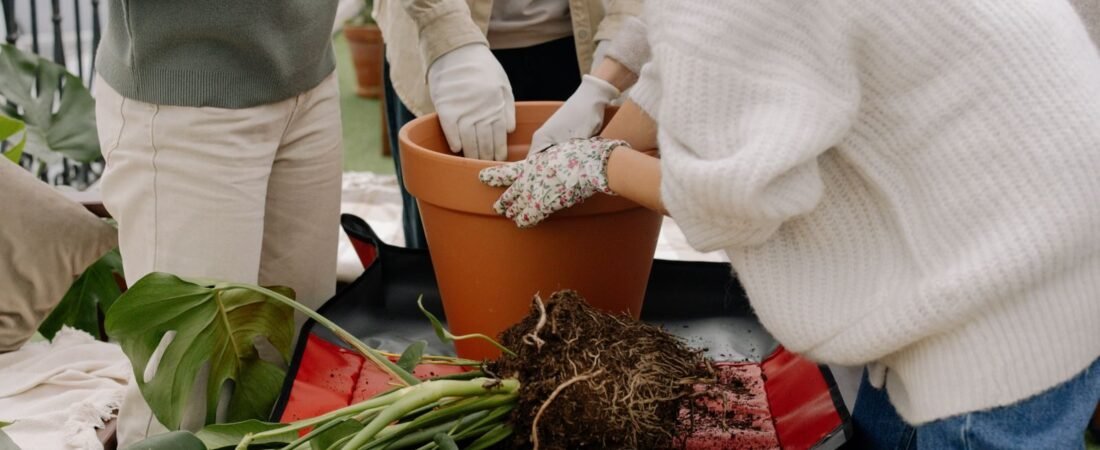
The short answer: repotting a monstera takes about 30 minutes and nine steps: water an hour ahead, move up only 2–3 inches in pot size, slide the plant out without yanking, inspect and loosen the root ball, tuck in the aerial roots, set a moss pole while the pot is open, fill with chunky mix, water deeply, and then leave it alone for 2–4 weeks. Below: the 7 signs it is actually time, the exact pot-sizing rule, and the 5 mistakes that cause transplant shock.
Monsteras grow fast — a healthy one can push out a foot of new growth in a season. That means it will eventually outgrow its pot, and when it does, repotting is one of the highest-impact things you can do for it. More room, fresh mix, and a moss pole installed while the pot is open can be the difference between a floppy, stalled plant and one that starts throwing split leaves again. If your monstera has stopped looking like itself, the pot is the first place to investigate.
How to know it is actually time to repot
Repotting is stressful for a plant, so you want to be sure it is necessary before you disturb the roots. Check for these signs first:
| Sign | What it tells you |
|---|---|
| Roots pushing through the drainage holes | The root ball has filled the pot — clearest repot signal there is |
| Soil dries out unusually fast | The pot is mostly roots, leaving little mix to hold water |
| Roots circling the inside of the pot when you lift the plant out | Classic root-bound; the roots have nowhere left to go |
| New growth has slowed or stopped in spring and summer | Often a space problem, especially combined with the signs above |
| Water runs straight through the pot | Soil is compacted or root-dominated and no longer absorbing properly |
| The plant tips over easily | Top-heavy growth plus a root ball that cannot anchor it |
| Soil shrinks away from the pot edges | The mix has compacted and degraded; a refresh helps even in the same size pot |
Two honest counterpoints: first, soil that falls apart easily and roots that look dark, mushy, or moldy mean you should pause — that is a watering or root-rot problem to diagnose first, not a repot problem. Second, if the root ball barely fills the pot, the plant does not need more room — it may just want a better watering rhythm or feeding schedule. Do not repot a plant purely because you hope it will grow faster; a repot that is not needed is stress with no payoff.
What you will need
- A new pot 2–3 inches wider in diameter than the current one — with drainage holes. Not more. An oversized pot holds wet soil around too few roots and invites rot.
- Fresh chunky mix — equal parts indoor potting soil, orchid bark, and perlite. Our DIY monstera soil recipe is tuned exactly for this.
- A tarp, old sheet, or newspaper — repotting is messier than you expect, especially indoors.
- Clean pruners or sharp scissors — wiped with rubbing alcohol, for any dead roots.
- A watering can and a spray bottle — water to settle the soil, the mister to keep exposed roots damp if you are working slowly.
- A moss pole or wooden plank (optional but recommended) — repotting day is the one time you can add support without stabbing into an established root ball.
- Gardening gloves — monstera stems are sturdy and soil gets under fingernails.
How to repot a monstera, step by step
Set aside about 30 minutes, and work where you can make a mess without regret. If your monstera lives indoors, repot it indoors — matching its normal temperature and light avoids extra shock.
- Water the plant an hour before. Moist soil slides out of the pot in one piece; dry soil crumbles and tears roots on the way out.
- Prep the new pot and mix. Moisten your chunky mix lightly so it is damp, not dripping — dry mix is hydrophobic and wets unevenly around the root ball. Add a 1–2 inch base layer to the new pot.
- Slide the plant out — do not yank it. Lay the pot on its side and coax the root ball free while supporting the stems at the base. If it is stuck, squeeze a flexible pot gently, or run a dull knife around the inside edge to release the roots. For a nursery pot the plant has grown into, cutting the pot open is kinder than ripping roots.
- Inspect the roots. Healthy roots are firm and white to light tan. Trim any mushy, black, or foul-smelling roots with clean pruners — those are rot and will spread in the fresh mix. If the roots are circling the ball in a dense mat, gently tease the outer roots loose with your fingers so they grow outward into the new soil instead of continuing to circle.
- Set the height. Rest the root ball on the base layer so its top sits about 1 inch below the pot rim. That gap gives you room to water without flooding the table. Plant it at the same depth it was before — never bury the stems deeper. Penn State Extension’s repotting guide recommends the same inch-below-the-rim rule.
- Guide the aerial roots in. Those long brown roots growing from the stems are aerial roots — in the wild they grab trees and pull moisture from the air. Gently tuck them down into the fresh mix; once buried, they convert to regular roots and anchor the plant. Do not force or snap them; if one will not bend, lay it across the surface and let soil cover it.
- Install the moss pole now (if using one). Place it at the back of the plant — monsteras have a front (where the leaves face) and a back (where aerial roots emerge). Set the pole before filling so you never have to stab it through an established root ball later. Tie stems loosely to the pole with soft plant ties.
- Fill and settle, do not pack. Spoon fresh mix around the root ball, tapping the sides of the pot to settle it into air pockets. Packing soil down hard is the worst thing you can do here — compressed mix loses the air pockets roots need and holds water instead of draining.
- Water deeply until it drains. Water slowly until it runs freely from the drainage holes, let the pot drain fully, then dump the saucer. The first watering collapses hidden air pockets — check the soil level over the next few waterings and top up mix if it settles noticeably.
Repotting a large monstera: the two-person method
A mature monstera with a moss pole can be a genuinely heavy, floppy handful. For big plants, repotting is a two-person job. Loosely bundle the leaves with a soft ribbon or strip of fabric to keep them out of the way, lay the plant gently on its side on a blanket or tarp, and have one person support the top growth while the other slides the pot off. Trying to wrestle a 5-foot monstera solo is how stems snap and poles punch through root balls.
Aftercare: what recovery looks like (2–4 weeks)
Some transplant shock is normal — your plant just had its entire root environment changed. Give it bright indirect light in its usual spot, and hold off on fertilizer for 2–4 weeks; fresh mix already contains nutrients, and extra fertilizer can burn stressed roots.
| What you will see | Normal or worry? | What to do |
|---|---|---|
| Slight drooping for a few days | Normal | Keep soil lightly moist, give it time |
| No new growth for 2–4 weeks | Usually normal | The plant is re-establishing roots; growth resumes after |
| One or two older leaves yellowing | Usually normal | Let them finish, then trim; watch the soil-check rhythm |
| Widespread yellowing or blackening | Worry | Check the overwatered vs underwatered guide — likely watering, not the repot itself |
| Soil staying soggy for days | Worry | Pot too big or no drainage — reassess the pot choice |
Expect the plant to sit quietly for 2–4 weeks, then surprise you with a new leaf — often a bigger one than before, especially if the moss pole is now supporting upward growth. If new leaves come out without splits, that is a light question, not a repotting failure.
5 repotting mistakes that cause transplant shock
- Jumping to a giant pot. The #1 beginner error. Two to three inches wider is the rule — more soil than the roots can handle stays wet and rots them.
- Adding a gravel layer at the bottom. It does not improve drainage; it creates a perched water table and raises rot risk. Use the chunky mix instead.
- Fertilizing on day one. Fresh mix feeds the plant for weeks. Early fertilizer burns recovering roots.
- Stabbing the moss pole in afterwards. It crushes the root ball. The pole goes in during the repot, at the back of the plant, before filling.
- Repotting a sick plant hoping to save it. A repot adds stress to an already struggling plant. If the roots are rotting or the leaves are failing, diagnose first — then decide whether a repot is part of the treatment.
Related rescues
- Best Soil Mix for Monstera: A Simple DIY Recipe — the 1-1-1 mix this repot calls for
- How Often to Water a Monstera: The Soil-Check Rule — the post-repot watering rhythm
- Why Are My Monstera Leaves Not Splitting? 6 Causes & Fixes — when new leaves stay solid
When is the best time of year to repot a monstera?
Spring and early summer, when the plant is actively growing and will root into the new mix fastest. A plant repotted in spring usually settles in within weeks; one repotted in late fall may sit dormant and sulk until spring returns. That said, if the plant is severely root-bound or the pot is cracking, repotting in winter is better than leaving it — just expect a longer recovery.
Should I remove all the old soil from the roots?
No — do not strip the root ball bare. Tease the outer roots loose and remove what falls away easily, but scrubbing off every bit of old soil breaks the fine feeder roots the plant needs most. It is better to leave some old mix behind than to damage healthy roots getting it perfectly clean.
Do monsteras like to be root bound?
They tolerate it for a while, but they do not prefer it. A slightly snug pot is fine and can even encourage a growth spurt, but a truly root-bound monstera slows down, dries out too fast, and stops sizing up its leaves. When the roots circle the pot or push through the drainage holes, it is time.
My monstera is already in the biggest pot I can fit. Now what?
Root-prune and refresh instead of upsizing. In spring, lift the plant, slice about a fifth off the bottom of the root ball with a clean knife, and repot into the same pot with fresh mix. This buys another year or two. You can also remove some top growth to keep the plant proportional to its pot.
Can I use regular potting soil instead of a chunky mix?
Regular potting soil alone compacts and holds too much water for a monstera, which is how repots end in root rot. If all you have is standard mix, cut it roughly half-and-half with perlite or orchid bark to open it up. The full 1-1-1 recipe in our soil guide is the version to aim for.