
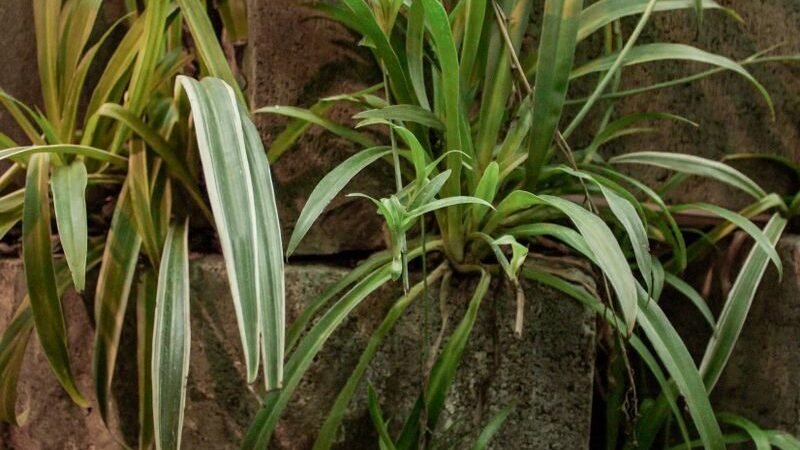
Quick answer: Snip a healthy spiderette — a baby plantlet hanging from a runner — and root it in water, in soil, or while it is still attached to the mother plant. Keep it in bright, indirect light, and expect roots in 1–3 weeks. Pot it up once the roots reach 2–3 inches long.
Spider plants are famously generous. A healthy mother plant sends out long arching runners, and each runner ends in one or more spiderettes — tiny, fully formed baby plants just waiting for a pot of their own. If yours is dangling babies everywhere, you are not looking at a problem. You are looking at free plants.
Propagating a spider plant (Chlorophytum comosum) is one of the easiest wins in houseplant care, and it works three ways: in water, directly in soil, or while the baby is still attached to the mother plant. This guide covers all three, so you can pick the one that fits your setup — and skip the one that does not.
Is Your Spider Plant Ready to Propagate?
Not every dangling baby is ready to leave home. Snip too early and you get a plantlet too small to root; wait too long and the runner just keeps growing. Check the baby against this table before you cut anything.
| What you see | What it means | Best next move |
| Several leaves, firm crown, 2–3 inches tall | The spiderette is mature enough to root well | Safe to root in water or soil |
| Tiny root nubs at the base | Rooting is likely to start fast | A strong candidate — cut it |
| Very tiny baby, no root nubs | Still immature | Leave it attached for a few more weeks |
| Yellowing or limp spiderette | Stressed or underdeveloped | Improve the mother plant’s care first |
The best time to propagate is spring or early summer, when the mother plant is actively growing. That said, spider plants root indoors year-round — a winter cutting just takes a little longer, so do not let the calendar stop you if you have a healthy baby right now.
What You Will Need
- Clean, sharp scissors or pruning shears (wipe the blades with rubbing alcohol first)
- A small glass or jar, if rooting in water
- Small pots (3–4 inches) and well-draining potting mix, if rooting in soil
- A bent paperclip or U-shaped wire, if rooting while attached
- Room-temperature water — let tap water sit out overnight so chlorine can dissipate
Rooting hormone is optional here. Spider plants root so readily that most growers skip it entirely, and a healthy spiderette does not need the help.
Method 1: Root Spiderettes in Water
Water propagation is the most popular method for one reason: you can watch the roots grow. It is also the best choice if you are propagating for the first time, because problems are visible early.
- Choose a healthy spiderette with several leaves and, ideally, small root nubs at its base.
- Cut the runner about half an inch below the spiderette with clean scissors.
- Place the spiderette in a small glass of room-temperature water so the base sits underwater but the leaves stay dry. Leaves sitting in water rot fast.
- Set the glass in bright, indirect light. Direct sun overheats the water and cooks the cutting.
- Change the water every 3–5 days to keep it fresh and oxygenated.
- Wait for roots to reach 2–3 inches, usually in 1–3 weeks.
- Pot the rooted spiderette in moist, well-draining mix and water it in gently.
Do not leave a water-rooted spiderette in the glass for months. Water roots are more fragile than soil roots, and the longer they stay submerged, the harder the transplant. Once the roots hit 2–3 inches, it is time for soil.
Method 2: Root Spiderettes Directly in Soil
Soil propagation skips the transplant step entirely, so the roots that form are already adapted to soil. The trade-off is patience: you cannot see what is happening underground.
- Fill a 3–4 inch pot with moist, well-draining potting mix.
- Cut a healthy spiderette from its runner with clean scissors.
- Press the base of the spiderette gently into the soil, just deep enough that it stands upright on its own.
- Water lightly, then keep the soil evenly moist — not soggy — for the first few weeks.
- Place the pot in bright, indirect light.
- After 2–3 weeks, give the plantlet a very gentle tug. Resistance means roots have formed.
A clear plastic bag tented loosely over the pot for the first week helps hold humidity, but leave it open at the bottom for airflow. Sealed, stagnant air invites rot, which defeats the purpose.
Method 3: Root While Still Attached to the Mother Plant
This is the gentlest method of all, and the one with the highest success rate. The baby keeps drawing water and nutrients from the mother plant while it grows its own roots, so there is no transplant shock at all.
- Set a small pot of moist potting mix next to the mother plant, close enough that a runner can reach it.
- Bend a runner down and rest a healthy spiderette on the soil surface, base touching the mix.
- Pin the spiderette in place with a bent paperclip or U-shaped wire — firm enough to hold contact, loose enough not to crush the stem.
- Keep the soil in the small pot evenly moist.
- After 3–4 weeks, check for resistance with a gentle tug.
- Once rooted, cut the runner between the mother plant and the new plant.
This method is ideal if you only want one or two new plants and you have space to park a small pot beside the mother plant for a month. It is less practical if you are propagating a dozen babies at once — that is what water propagation is for.
Which Method Should You Choose?
| Method | Roots in | Best for | Watch out for |
| Water | 1–3 weeks | Beginners, watching progress, many babies at once | Transplant at 2–3 inches — do not wait months |
| Soil (cut) | 2–3 weeks | Stronger roots, no transplant step | Overwatering before roots form |
| Attached | 3–4 weeks | Highest success rate, one or two plants | Needs space beside the mother plant |
Timeline: What to Expect Week by Week
| When | Water method | Soil / attached method |
| Week 1 | Root nubs swell; tiny white roots may appear | Little visible change — roots are forming underground |
| Week 2 | Roots 1–2 inches long | Gentle tug may show early resistance |
| Week 3 | Roots 2–3 inches — time to pot up | Roots established; attached babies can be cut free |
| Week 4+ | New plant settling into soil; first new leaf soon | New growth visible above the soil |
If nothing has happened by week 4, something in the setup is off — see the troubleshooting section below before you give up on the cutting.
Troubleshooting: Why Your Spiderette Is Not Rooting
- Leaves sitting in water: Submerged leaves rot and take the cutting with them. Only the base goes underwater.
- Stale water: Change water every few days. Slimy or cloudy water starves the cutting of oxygen.
- Too little light: A cutting in a dark corner stalls. Bright, indirect light is the sweet spot — no direct sun.
- Too cold: Rooting slows sharply below 60°F. Keep cuttings in a normally heated room.
- Baby cut too small: A spiderette with one tiny leaf and no root nubs may never get going. Leave small babies attached longer next time.
- Fluoride in tap water: Spider plants are sensitive to fluoride, which can brown leaf tips. Let tap water sit overnight, or use filtered water for cuttings.
Aftercare: The First Month in Soil
A newly potted spiderette is not yet a tough, neglect-tolerant houseplant. For the first month, keep the soil lightly moist rather than letting it dry out fully, and keep the plant out of direct sun. Once you see a new leaf unfurling, the plant has settled in — from there, normal spider plant care applies. If the leaf tips brown, check your water first: fluoride and letting the soil dry out completely are the usual culprits, which is also why brown tips are the classic complaint covered in our guide to spider plant brown tips.
Hold off on fertilizer for the first 4 weeks. Fresh potting mix already contains nutrients, and feeding a cutting that is still building roots risks burning them. When you do start feeding, go at half the label strength — spider plants are light feeders, and over-fertilizing actually reduces plantlet production on the mother plant.
When to Give Up on a Spiderette
Most spiderettes root, but not all of them, and that is normal. Give up on a cutting if the base has turned soft, translucent, or mushy — that is rot, and it will not reverse. A cutting that has simply stalled for 4–5 weeks with no roots and no rot can be given one more chance in fresh water and brighter light, but if nothing changes after that, compost it and try another baby. The mother plant will make more. That is the whole point of a spider plant.
Related Rescues
- Why Is My Spider Plant Turning Brown at the Tips?
- How to Propagate Pothos in Water: 7 Steps for Roots in 1–2 Weeks
- How to Increase Humidity for Houseplants: 5 Methods
Also see our guide to telling overwatered vs underwatered plants if your new cutting starts looking droopy — watering is the first thing to check.
Can I propagate a spider plant without roots on the baby?
Yes. A spiderette does not need roots before you cut it — it needs a node, the firm base where the leaves emerge. Place that base in water or moist soil and roots usually appear within 1–3 weeks, as long as the baby has several leaves and is kept in bright, indirect light.
How long does it take for a spider plant cutting to root?
Most spiderettes root in 1–3 weeks in water and 2–3 weeks in soil. Babies left attached to the mother plant take 3–4 weeks. Cold rooms, low light, and very small babies all slow things down.
Should I root spider plant babies in water or soil?
Water is best if you want to watch the roots grow and confirm progress, and it works well for many babies at once. Soil gives stronger roots and skips the transplant step. Rooting while still attached to the mother plant has the highest success rate but needs space beside the parent.
When should I pot a water-rooted spider plant cutting?
Pot it up once the roots reach 2–3 inches long, usually at 2–3 weeks. Do not leave it in water for months — water roots are fragile, and the longer they stay submerged, the harder the move to soil becomes.
Why is my spider plant cutting rotting in water?
The usual cause is leaves sitting underwater, which rot quickly. Only the base should be submerged. Change the water every 3–5 days, keep the cutting in bright indirect light, and start with a healthy spiderette that has several leaves and root nubs.