
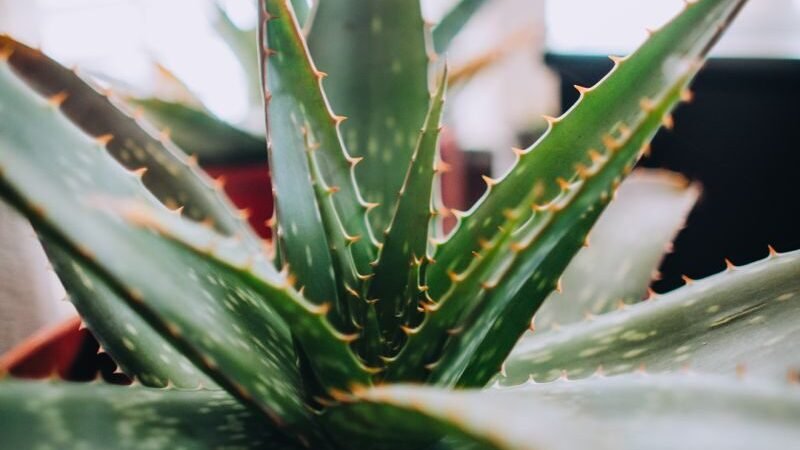
Quick diagnosis: Brown aloe leaves are your plant talking — and the texture tells you exactly what it’s saying. Press the brown leaves: soft and mushy at the base means overwatering (stop watering now, check the roots). Dry, crispy tips mean too little water or harsh sun. A firm, reddish-brown blush all over is harmless sun stress — no fix needed. The emergency fix takes 10 minutes; full recovery takes a few weeks.
Aloe vera has a reputation for being nearly indestructible, so brown leaves feel like a personal betrayal. But browning is one of the most readable signals a plant can give you: the pattern, the location, and the texture each point to a different cause — and a different fix. This guide covers the 7 reasons aloe vera turns brown, how to confirm which one you’re dealing with, and exactly what to do about each.
How to Diagnose a Brown Aloe in 60 Seconds
Before you change anything, touch the plant. This texture test eliminates most causes immediately:
| What you see | What it feels like | Most likely cause | Go to |
|---|---|---|---|
| Soft, mushy leaves near the base | Squishy, waterlogged | Overwatering / root rot | Sections 1–2 |
| Dry, brown, papery leaf tips | Crispy, thin edges | Underwatering or scorched by harsh sun | Sections 3–4 |
| Bleached or brown patches on the sun-facing side | Dry, brittle | Sunburn | Section 4 |
| Reddish-brown tint all over, leaves still plump | Firm, healthy | Sun stress — harmless, needs no fix | “Not always a problem” below |
| Limp, collapsed brown leaves after a cold night | Soft, watery | Cold damage | Section 5 |
| Only the lowest, oldest leaves drying out | Dry, shriveling | Natural aging — normal | “Not always a problem” below |
Is browning always a problem? Not always. The oldest, lowest leaves naturally dry up and die as the plant grows — that’s healthy, and you can snip them off at the base for looks. And aloe often turns a reddish-brown color in bright sun; that blush is the plant producing protective pigments, and it stays firm and healthy underneath. The time to act is when browning is spreading upward, hitting multiple leaves, or comes with soft, mushy, foul-smelling tissue.
1. Overwatering — the #1 reason aloe leaves turn brown
Aloe leaves are water-storage tanks, and they fill up until there’s nowhere left to put the water. When soil stays wet, the leaf cells take on too much and start to fail — leaves turn yellow-brown, go soft and almost translucent near the base, and the plant looks swollen instead of firm.
How to confirm: Push your finger an inch or two into the soil. If it’s damp several days after you last watered, the roots are sitting in too much moisture. Pinch a brown leaf near the base — if it gives like a water balloon, that’s overwatering.
Fix it — numbered steps:
- Stop watering immediately. Not “water less” — stop, fully, until the soil dries out all the way down.
- Pour out any water sitting in the saucer, cache pot, or outer sleeve.
- Move the plant somewhere with bright, indirect light and good air circulation. A fan nearby helps the soil dry faster.
- Don’t water again until the soil is completely dry. For most indoor aloe, that means every 2 to 3 weeks in spring and summer, and even less in winter — but always check the soil, never the calendar.
- Going forward, use the wet-dry cycle: soak the soil thoroughly until water drains from the bottom, then wait until it’s fully dry before watering again. If you’re still unsure which watering mistake you’re making, work through Overwatered vs. Underwatered: How to Tell the Difference.
2. Root rot — when the damage is underground
Left unchecked, overwatering leads to root rot: soggy soil has almost no oxygen, which lets fungi attack the roots. The cruel twist is that black, slimy roots can’t absorb water — so a rotted plant dies of dehydration while drowning. Mushy browning that keeps spreading upward even after you’ve stopped watering means the problem has moved underground. (Succulents hit by the same chain of events show it a little differently — mushy leaves that drop off entirely.)
How to confirm: Gently slide the plant out of its pot. Healthy roots are white or light tan and firm. Rotted roots are dark brown or black, mushy, and may smell sour or swampy.
Rescue it — numbered steps:
- Unpot the plant and shake or brush all the wet soil off the roots.
- With clean scissors, cut away every black, slimy root and every mushy leaf. Be ruthless — rotting tissue left behind keeps spreading. Keep only firm, light-colored roots and leaves.
- Lay the plant on a paper towel out of direct sun for 1 to 3 days. This lets the cut surfaces dry so fungi can’t get back in through the wounds.
- Repot into fresh, dry, fast-draining mix (see section 6). Do not reuse the old soggy soil.
- Wait 5 to 7 days, then give it a light watering. Then return to the wet-dry cycle.
3. Underwatering — dry, crispy brown tips
The opposite problem, with an unmistakable look: underwatered aloe turns brown at the leaf tips and margins, and the leaves feel thin, papery, and deflated instead of plump. The soil pulls away from the pot edges, and the plant may curl its leaves inward to conserve moisture.
How to confirm: The soil is bone dry, the brown parts are crispy rather than mushy, and the leaves feel thin rather than swollen.
Fix it — numbered steps:
- Give the plant a deep, thorough soak — let water run out the drainage holes.
- Wait 10 minutes and soak it again. Very dry soil can repel water the first time; a second pass ensures it actually absorbs.
- Set a more consistent rhythm: check the soil every couple of weeks in the growing season and water when the top 2 to 3 inches are dry.
- Don’t overcorrect. A deeply underwatered aloe is stressed, and flooding it on a schedule is how owners swing straight into overwatering.
4. Sunburn — too much direct sun, too fast
Aloe vera loves bright light, but there’s a big difference between bright and blazing. Brown, bleached, or washed-out patches on the side of the plant facing the window or sun are sunburn — and it almost always happens after a sudden change, like moving an indoor aloe outside in summer or shoving it into a south-facing window.
How to confirm: The brown patches are dry and brittle, they’re on the sun-facing side only, and they appeared within days or a couple of weeks of a move. The rest of the plant still feels firm.
Fix it — numbered steps:
- Move the plant back to bright, indirect light. An east-facing window — gentle morning sun — is the sweet spot for most homes.
- If your only bright spot is a south- or west-facing window, pull the plant back a few feet from the glass or hang a sheer curtain to soften the afternoon rays.
- Acclimate gradually next time: start with a couple of hours of direct sun and build up over one to two weeks rather than moving a shade-grown plant straight into full sun.
- Sunburned patches won’t turn green again, but new growth will come in healthy. Only trim the worst leaves for looks.
5. Cold damage — browning after a chilly night
Aloe is a warm-climate plant, and it shudders at the cold. Leaves that went limp, brown, and watery after a cold night near a drafty window — or a plant left on a porch when temperatures dropped — are cold-shocked. Below about 50°F is where the real danger starts.
How to confirm: The browning appeared within a day or two of cold exposure; the leaves feel soft and limp rather than dry; you can trace it to a draft, an open window, a vent, or a night outside.
Fix it — numbered steps:
- Move the plant somewhere warm right away — away from vents, exterior doors, and drafty windows.
- Trim off leaves that are completely limp and translucent; they won’t recover and can invite rot.
- Leave the rest alone. Partially damaged leaves may stabilize, and the plant can push new growth from the center once it’s warm.
- Prevention: bring aloe indoors before fall nights drop below 50°F, and don’t station it next to a blast of air conditioning in summer either.
6. Poor drainage — the pot or soil is the real problem
Sometimes your watering habits are fine and the container is the culprit. Regular potting soil holds water like a sponge, a pot with no drainage holes turns into a swamp, and an oversized pot means a huge volume of soil that stays wet for weeks around a small root system.
How to confirm: The soil is still damp a week after watering; water pools on the surface; the pot has no drainage hole; or there’s a pebble “drainage layer” at the bottom (this doesn’t work — water just sits on top of it).
Fix it — numbered steps:
- Repot into a container with drainage holes. Terracotta is ideal — the porous clay wicks moisture out of the soil and helps it dry faster than plastic or glazed ceramic ever could.
- Use a fast-draining mix: a bagged cactus/succulent mix works, or make your own with roughly 2 parts mineral material (perlite, pumice, or coarse sand) to 1 part regular potting soil.
- Size the pot to the root ball — only an inch or two wider. Aloe prefers a snug pot because small volumes of soil dry out quickly.
- NC State Extension’s aloe vera guide backs this up: grow in very well-drained succulent soil, let it dry completely between waterings, use a pot with drainage holes, and choose clay — the single most forgiving setup you can give this plant.
7. Pests and over-fertilizing — the rare suspects
Pests are uncommon on aloe, but a stressed plant outdoors in summer can pick up mealybugs (white cottony clusters in the leaf joints), aphids, or scale. Sap-sucking insects weaken the plant and leave stress spots that brown. Fungal issues like aloe rust or leaf spot follow the same overwatering-and-poor-air-circulation pattern covered above.
How to confirm: Look closely at leaf joints, undersides, and the base for cottony fluff, tiny bumps, or sticky residue. For fertilizer damage, check your habits: brown crispy edges after fertilizing usually mean salt burn.
Fix it:
- Dab mealybugs with a cotton swab dipped in rubbing alcohol; use insecticidal soap for heavier infestations. Isolate the plant until it’s clear.
- On fertilizer: aloe has tiny nutritional needs — feed at most once or twice a year with a diluted succulent fertilizer, and skip it entirely in fall and winter. If you overdid it, flush the soil with plain water to leach out the salts.
- Improve air circulation around the plant — moving air is the simplest fungicide there is.
Recovery timeline — what to expect
- Days 1–3: No new leaves should start browning once watering stops and the plant is out of harsh sun. If mushiness keeps spreading, unpot and check the roots (section 2).
- Weeks 1–2: The plant stabilizes. Firm leaves stay put; the soil finally dries out.
- Weeks 2–4: New growth may appear at the center of the rosette — your sign the rescue is working.
- 1–2 months: New leaves come in green and plump. Old brown leaves won’t re-green, so prune the worst ones once you see healthy growth replacing them.
For simple overwatering caught early, expect visible improvement in 3 to 6 weeks. After root-rot surgery, give it 2 to 3 months before judging.
When to give up (honest talk)
Not every aloe makes it, and knowing when to stop saves weeks of false hope:
- The base of the plant is black and mushy all the way up to the crown, with no firm tissue left to cut back to.
- Every leaf is translucent and the center of the rosette pulls apart in your fingers.
- The sour rot smell persists even after you’ve trimmed away all the bad roots.
If the plant is pushing pups (offsets) around the base, you haven’t lost — you’ve got new plants. Let a pup grow until it’s a few inches tall with its own roots, then separate it with a clean knife, let the cut dry for a day, and pot it in dry succulent mix. That’s not failure; it’s a restart. Compost the rest without guilt and chalk it up to the lesson every aloe grower learns exactly once: when in doubt, don’t water.
Frequently asked questions
Will brown aloe vera leaves turn green again?
No. Leaves that have already turned brown won’t re-green — the tissue is damaged. Focus on stopping the cause: fix the watering, light, or soil, and let the new growth come in healthy. You can trim the worst brown leaves at the base for looks once recovery is underway.
Should I cut off brown aloe leaves?
Trim leaves that are fully brown, mushy, or limp — they’re rotting tissue and can invite fungal problems. Cut cleanly at the base with clean scissors. Leave partially green leaves alone; the plant can still pull resources from them while it recovers.
Why is my aloe vera turning brown after repotting?
Repotting stress plus a drink too soon is the usual cause. Aloe needs a dry spell after repotting — wait 5 to 7 days before the first watering so damaged roots can callus. Also check that the new pot isn’t oversized and has drainage holes.
Can I save an aloe vera with root rot?
Yes, if any firm roots or leaves remain. Trim away all black, mushy roots and leaves, let the cuts dry for 1 to 3 days, repot in fresh dry succulent mix, and wait a week before watering. If the whole base is black mush up to the crown, it’s time to save the pups instead (see “When to give up”).
How often should I water my aloe vera indoors?
Every 2 to 3 weeks during the growing season, less in winter — but treat that as a starting point, not a rule. Always check that the soil is completely dry before watering. Pot size, soil mix, light, and humidity all change the timing.
Why are my aloe vera leaves turning brown at the tips?
Brown, crispy tips are the underwatering signature — the leaves feel thin and papery, and the soil is bone dry. Give the plant a deep soak, wait 10 minutes, and soak it again so the very dry soil actually absorbs water. Then set a consistent rhythm: check the soil every couple of weeks in the growing season and water only when it’s fully dry.
Why is my aloe vera turning brown in full sun?
Aloe loves bright light but burns in sudden, intense sun — brown, bleached patches on the sun-facing side that appeared within days of a move mean sunburn. Move it back to bright, indirect light and acclimate gradually next time, building up direct sun over one to two weeks. The burned patches won’t re-green, but new growth will come in healthy.
My aloe vera has a mushy brown base — what do I do?
A mushy brown base means rot, and it spreads fast — act now. Unpot the plant, cut away every black, slimy root and mushy leaf with clean scissors, and let the cuts dry for 1 to 3 days out of direct sun. Repot into fresh, dry, fast-draining mix and don’t water for 5 to 7 days; if no firm tissue remains at the crown, the plant is beyond saving.
Related rescues
- What Does Root Rot Look Like? Signs & How to Fix It
- Why Are My Succulent Leaves Mushy & Falling Off? 7 Fixes
- Overwatered vs. Underwatered: How to Tell the Difference
- Brown Spots — the full symptom guide for brown patches and spots.